Streaming Software
Mixxx
Linux, MacOS, Windows; Free and Open-Source
Mixxx is free and open-source DJ software that also supports live broadcasting via IceCast and ShoutCast servers.
Live broadcasting settings can be found in the preferences menu (Options -> Preferences). It is recommended to use “Icecast 2” mode when broadcasting to AzuraCast. Out of the box, Mixxx does not include the LAME MP3 encoder (for licensing reasons), but it is not needed when connecting to AzuraCast; just set your broadcast format to ‘Ogg Vorbis’ and LiquidSoap will transcode the broadcast into the correct output format.

BUTT
Linux, MacOS, Windows; Free and Open-Source
Cross-platform and available for free at https://sourceforge.net/projects/butt/. Streaming via both IceCast mode and ShoutCast mode are available.
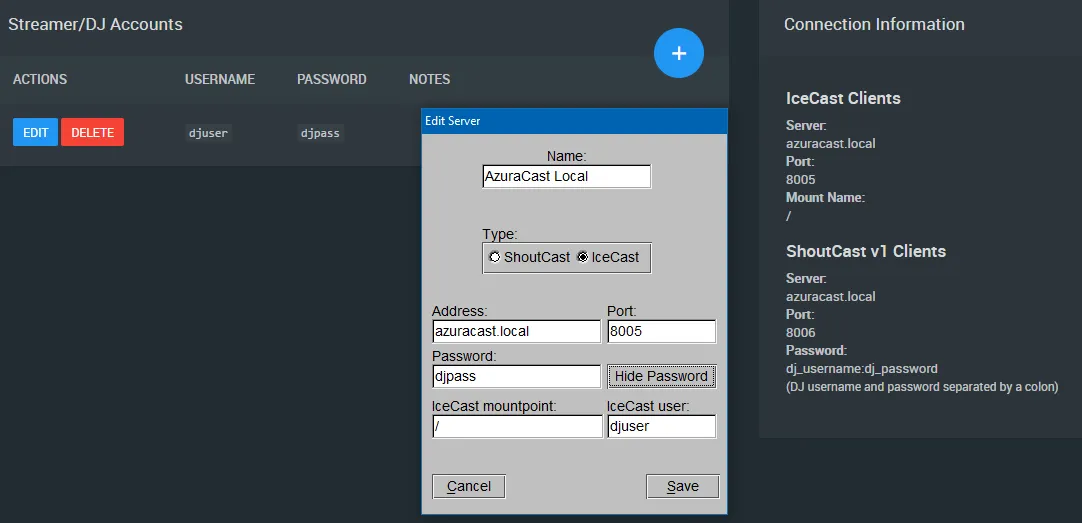
IceCast Mode
Use the exact information specified on the Streamer/DJ page’s right sidebar. “Address” is “Server” and “Icecast mountpoint” is “Mount Name”.
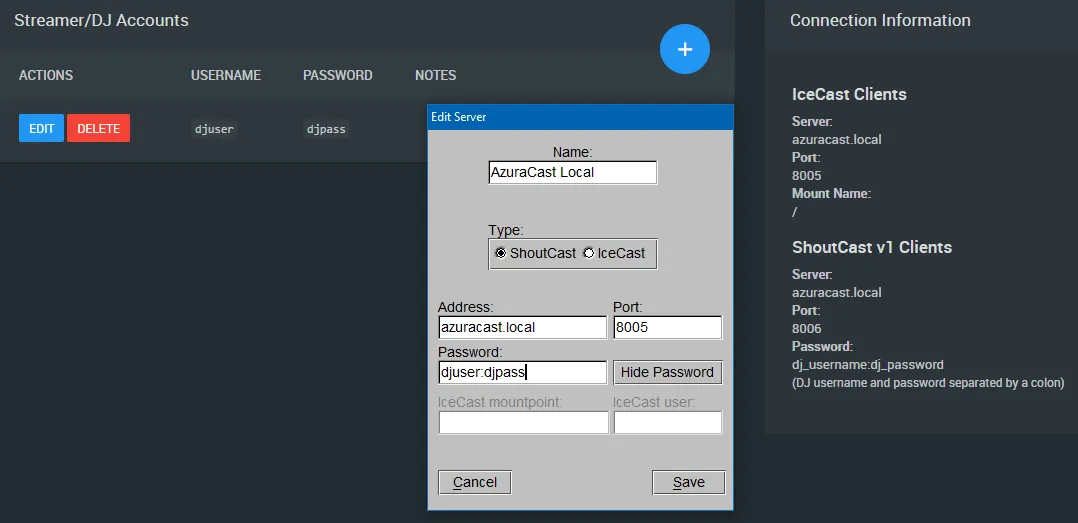
ShoutCast Mode
Use the given port specified in the “ShoutCast v1 Clients” section. Since ShoutCast v1 does not let you specify a username, specify your password as dj_username:dj_password (the username and password for the DJ separated by a colon).
SAM Cast
Windows; Proprietary, Commercial
SAM Cast is commercial software sold by Spacial. It is compatible with AzuraCast by using the MP3 encoder and the “IceCast 2” server connection settings.
Broadcasting Steps
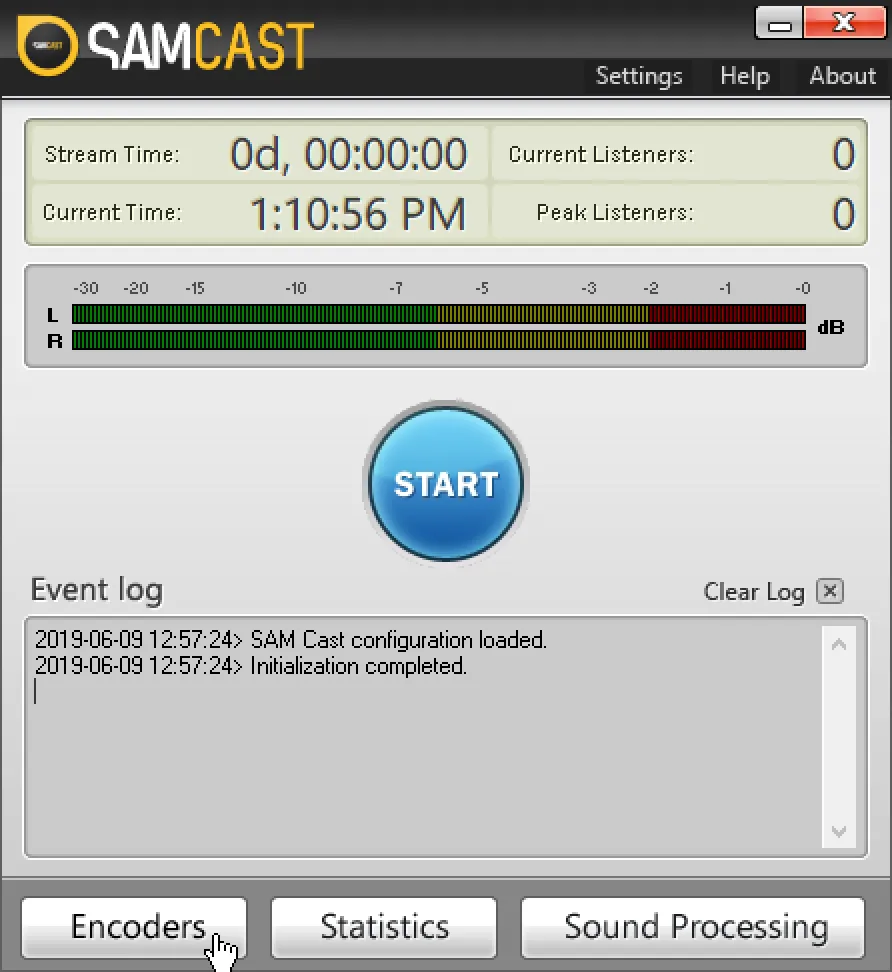
From the main SAM Cast window, click “Encoders” at the bottom left.
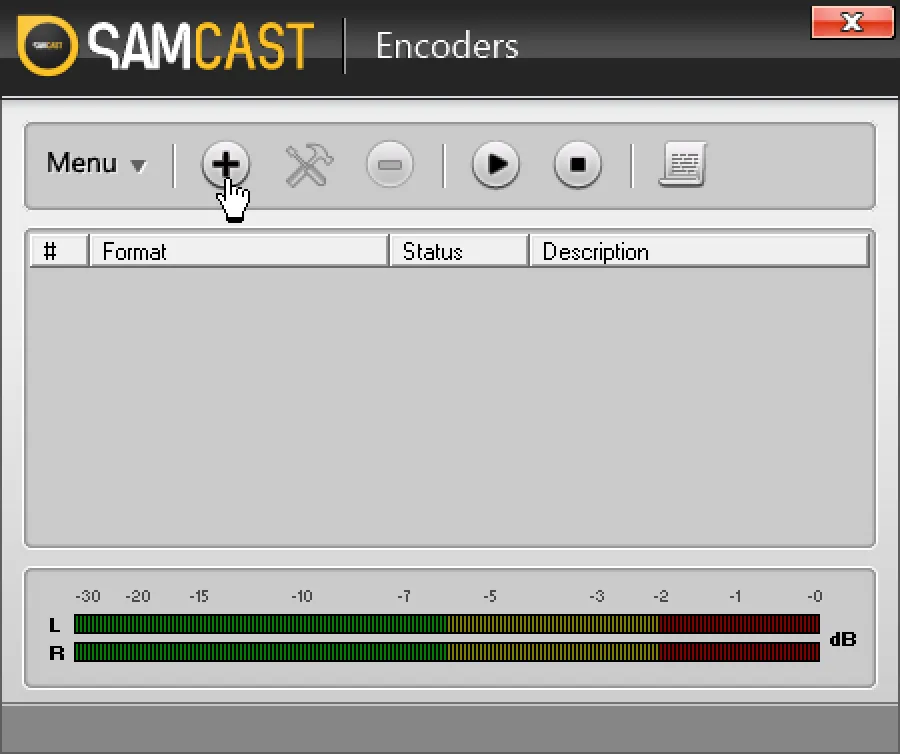
In the Encoders window that pops up, click the plus sign button on the toolbar to add a new encoder.
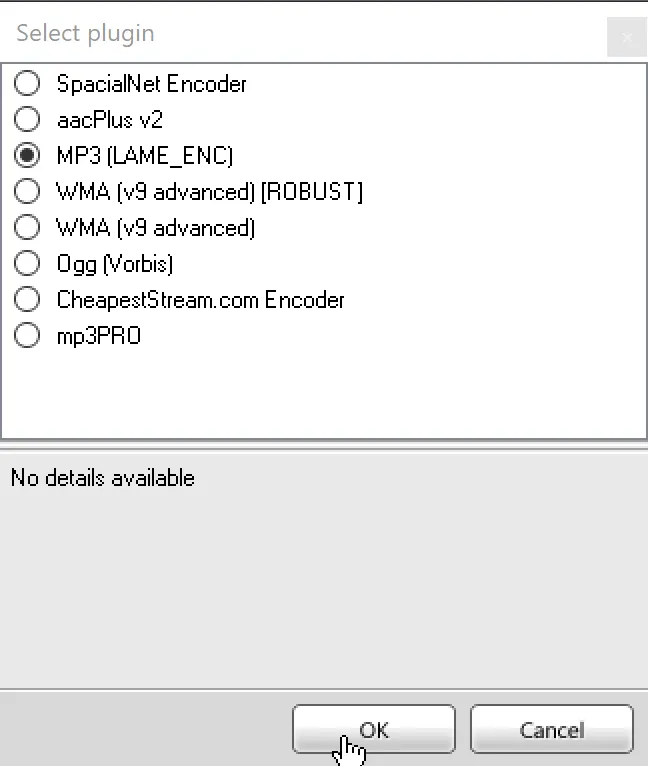
You will be asked to select an encoder. It is recommended to select MP3 (LAME_ENC), because this allows for the easiest constant bit rate (CBR) streaming, which causes the fewest issues when broadcasting.
Click “OK” at the bottom to continue to encoder details.
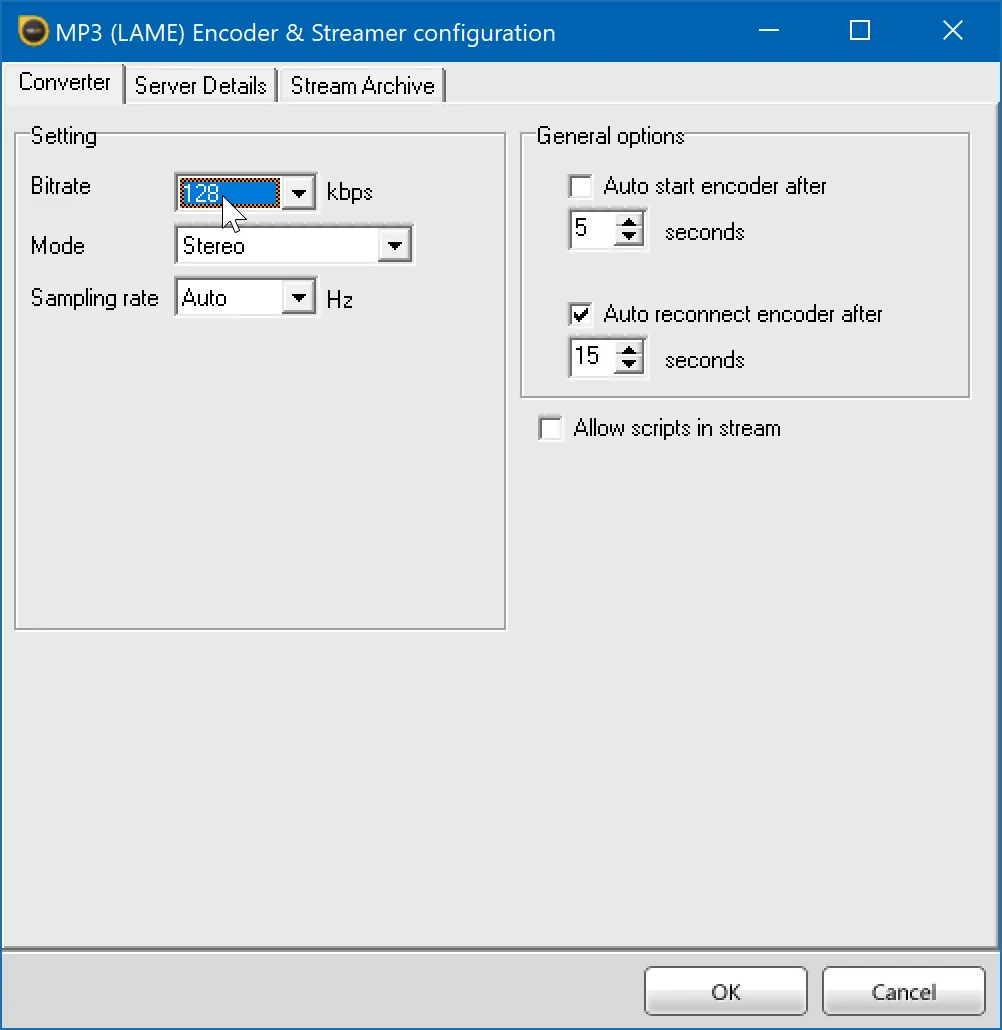
On the first tab of the encoder details, change your bitrate from the default 64kbps to your desired bitrate. This should likely match the highest bitrate that you broadcast out to your listeners. By default, it should at least be 128kbps.
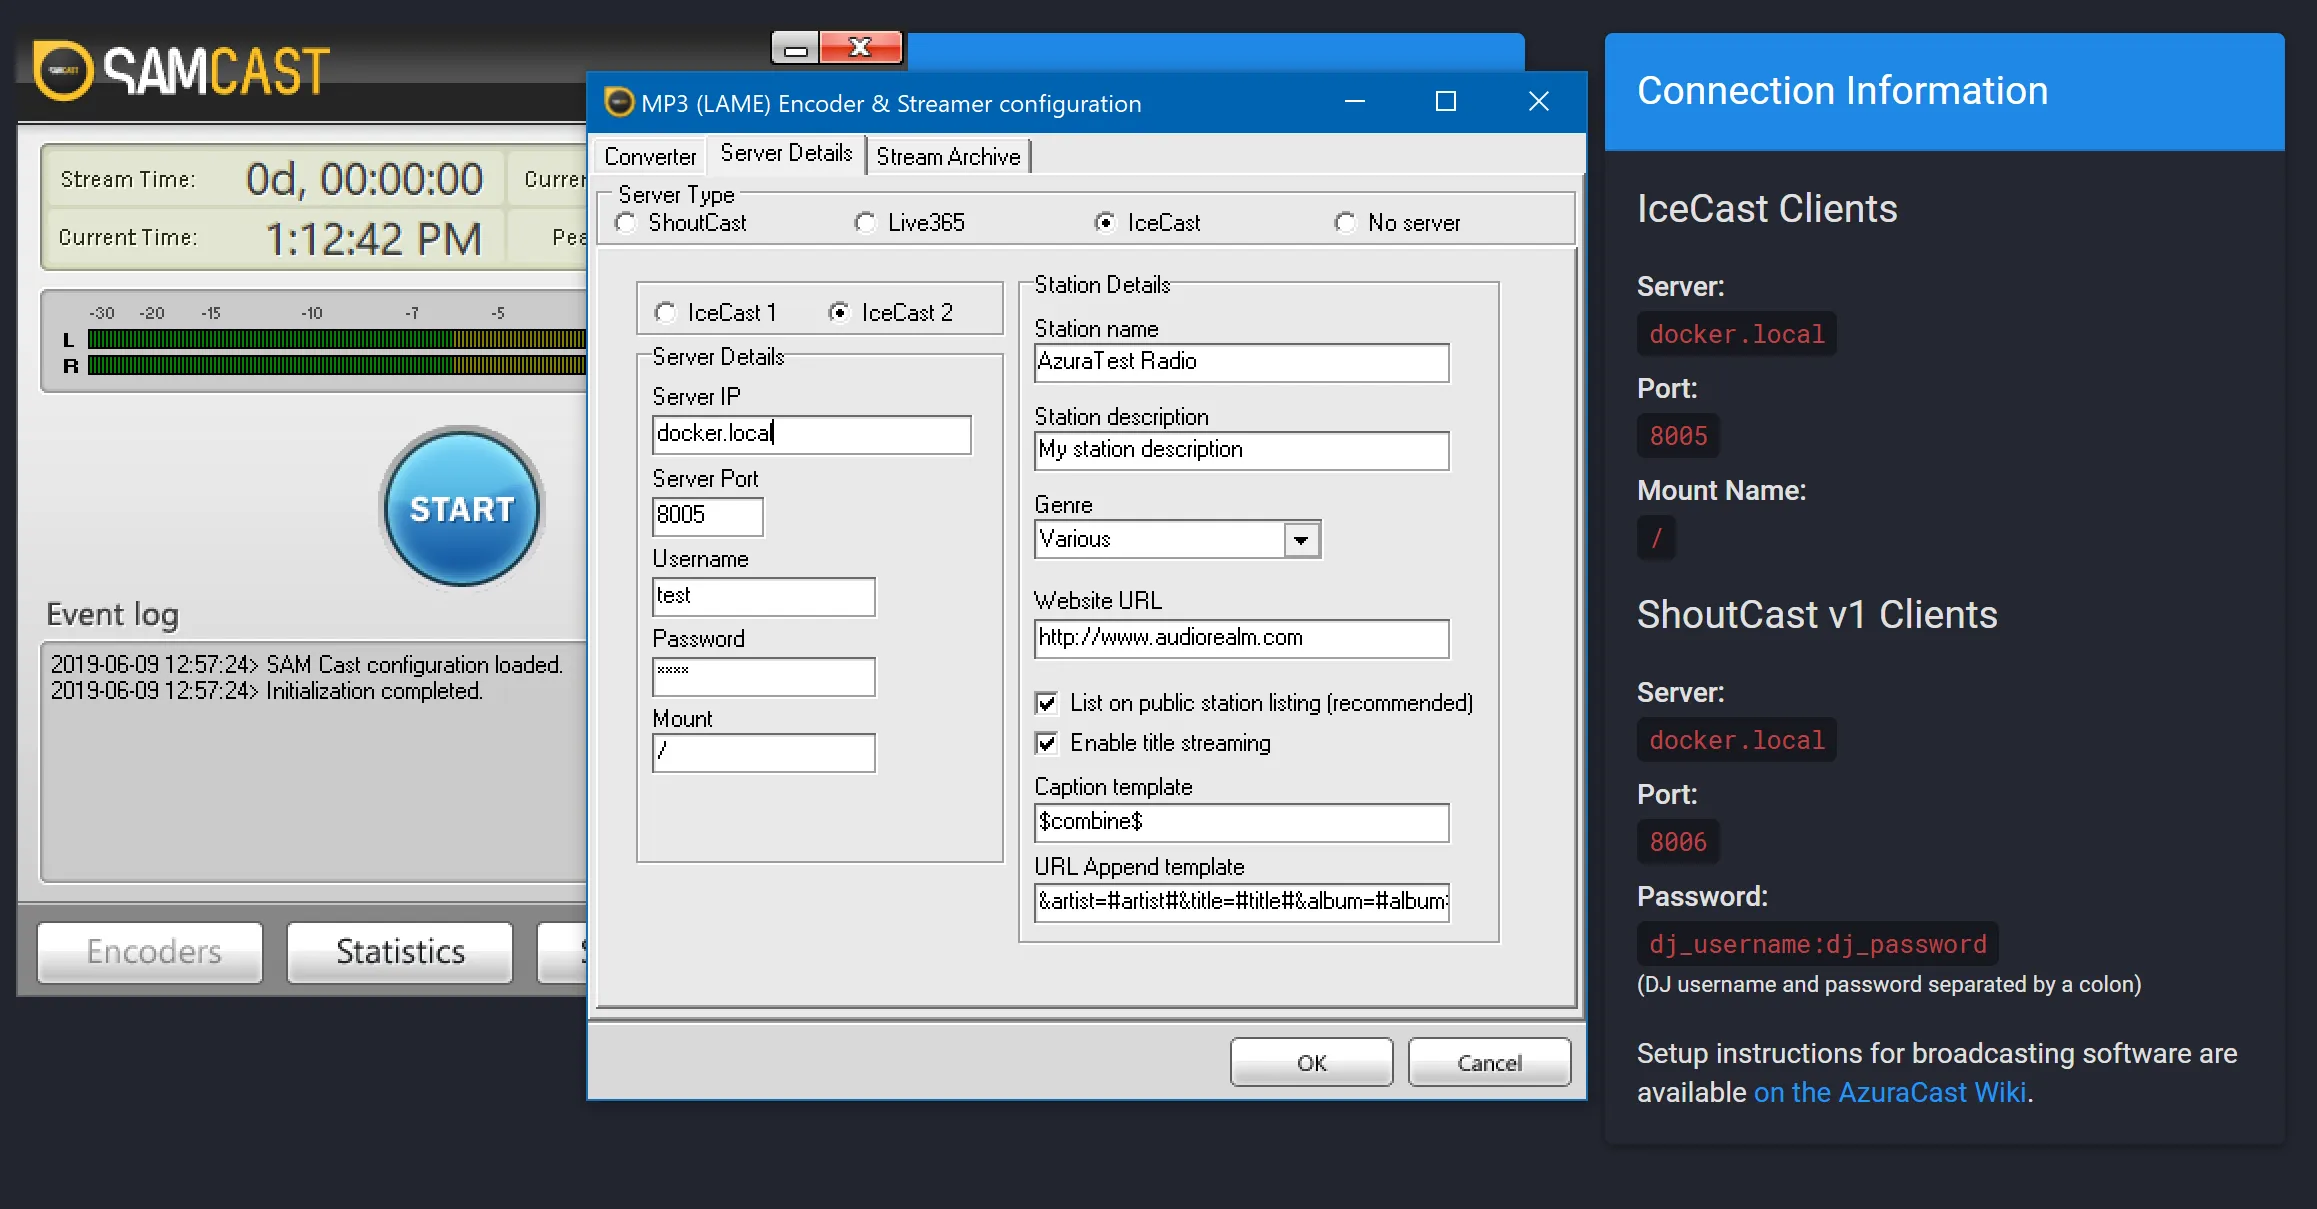
Click the “Server Details” tab. On the “Server Type” selector, choose “IceCast”, then choose “IceCast 2” in the secondary selector.
You can now populate the “Server Details” section with the connection information supplied to you via AzuraCast’s “Streamers/DJs” page. You will want to use the connection information for “IceCast Clients”, the first section on the page.
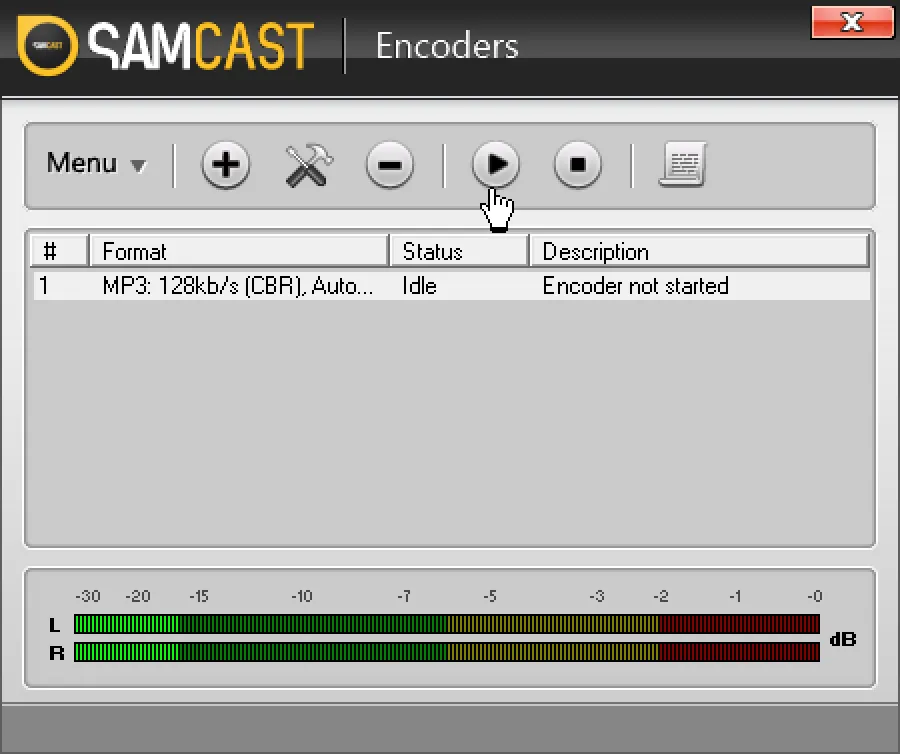
Click OK to return to the main Encoders pane, where you will now see a new encoder with “Idle” status.
Select the encoder, then click the play-button icon in the toolbar to begin broadcasting.
RadioBOSS
Windows; Proprietary, Commercial
RadioBOSS is a commercial software sold by IP Kuzmitski D.V. at DJSoft.net.
Streaming via both IceCast mode and ShoutCast mode are available.
The Live broadcasting feature is possible in their Standard and Advanced edition (not in the Express edition).
Note that for ease of use we use the Configuration Wizard, you can also enter all connection details manually.
Instructions
-
In the top menu bar, select
Settings->Options -
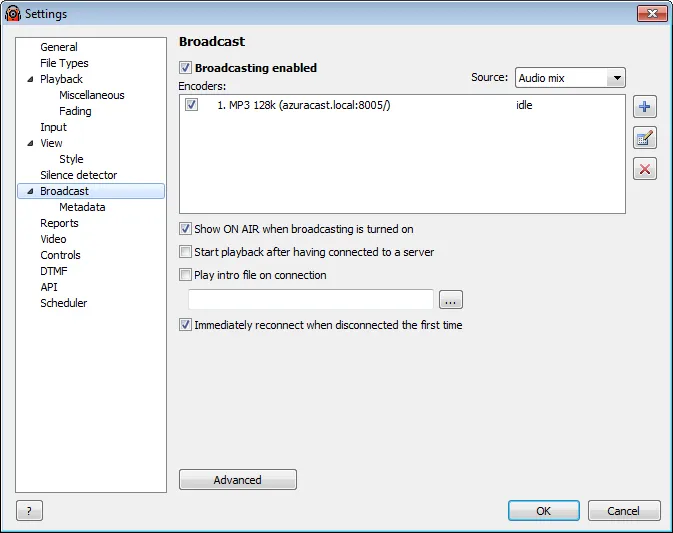
In the
Settingswindow, selectBroadcaston the left -
To add a new encoder, click the
+button
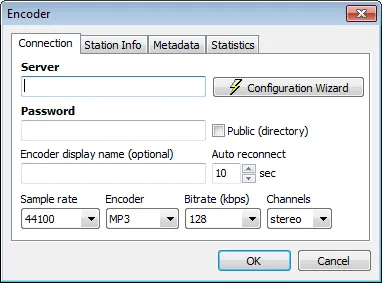
- The Encoder-window will open, next click the button called
Configuration Wizard.
Follow the instructions for the server type you have set up your Azuracast station with:
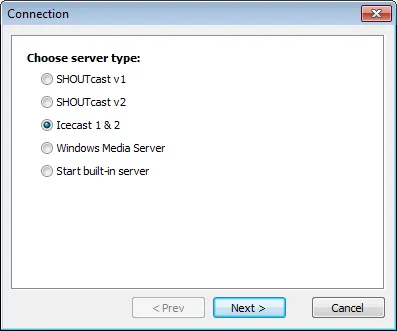
Icecast
- Select
Icecast 1 & 2and clickNext >
- Take over the corresponding credentials you can find in Azuracast:
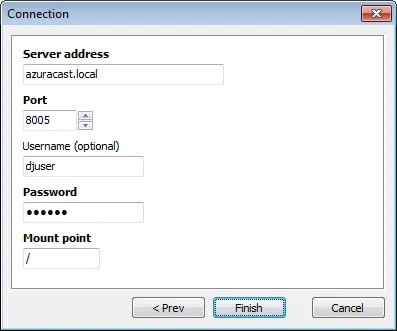
- Click
Finish
SHOUTcast
The following settings are recommended for both ShoutCast v1 as v2 (DNAS 2)
Note 1: Use the given port specified in the “ShoutCast v1 Clients” section.
Note 2: Be sure to select v1, as v2 will append the Stream ID (SID), which won’t work.
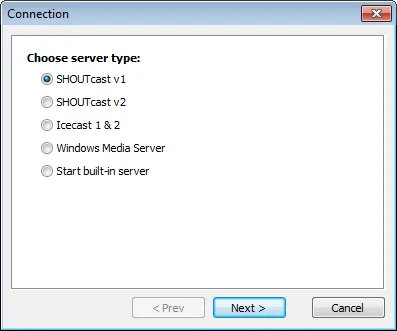
- Select
SHOUTcast v1and clickNext >
- Take over the corresponding credentials you can find in Azuracast (see notes above):
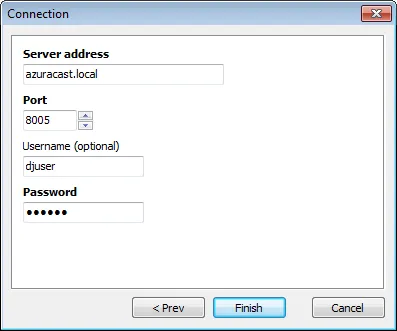
- Click
Finish
- Finish by changing the rest of the settings by preference:
-
Connection
- Sample Rate
- Encoder
- Bitrate
- Channels
-
Station info
If needed, here you can override the info that can be found in the main
Settings(From step 1), underBroadcasting->Metadata
-
Then finally click
OKto save the Encoder. -
In the Settings window, check the checkboxes for all encoders that you want to use. Remember to turn on the option
Broadcasting enabledon top.
On succesful connection, the log report in the bottom-left corner of RadioBOSS will show the following message: “Connected to server! (Output N)“. This means that listeners can now connect to the streaming server (either IceCast or ShoutCast).
If the logs show “[E40] Cannot start broadcast” in red, go over the above steps.
More information can be found in the RadioBOSS Help System. Press Ctrl+F1 inside the RadioBOSS application, or in the top menu bar go to Help -> Contents.
The following articles in there are helpful:
Operation->Broadcasting Internet radioOptions->BroadcastOptions->Broadcast->Metadata
PlayIt Live
Windows; Proprietary, Free
PlayIt Live is a free live-assist and automated radio playout system from PlayIt Software.
It allows streaming via IceCast, SHOUTcast v1 and SHOUTcast v2 via a plugin, that you can download for free here, after creating an account on their website. This plugin also allows you to record the stream, in MP3.
The installation steps for the plugin are relatively simple, so they’re not covered in this guide.
Note: This software is only capable of streaming via MP3, due to plugin limitations.
Instructions
These instructions are valid and required for both streaming modes (IceCast and SHOUTcast), so be sure to follow this part before proceeding any further.
1. After installing the Internet Broadcast plugin, select the menu Plugins menu, on the top menu bar and select the Plugin Manager… option.
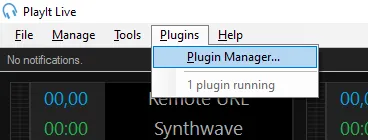
Select the Plugins menu, then the Plugin Manager option
2. A new window should appear, and within it the Internet Broadcast plugin.
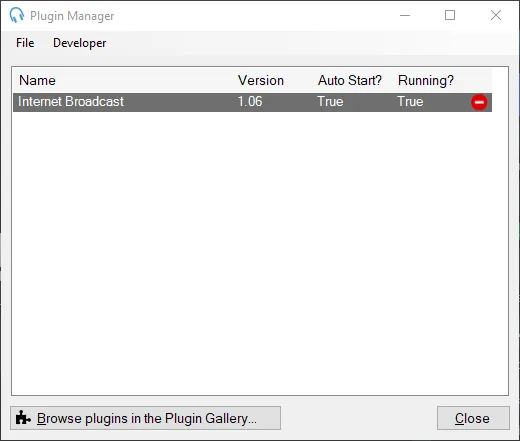 The Plugin Manager window
3. Open the plugin settings, by double clicking on it’s name. This window should appear.
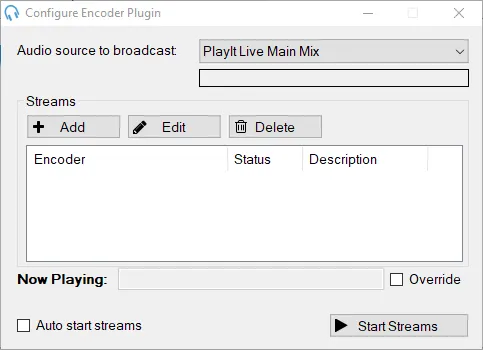 Plugin Settings
There are a few settings that you can customize here:
- In Audio source to broadcast you can define which input is going to be transmited to the server;
- Auto start streams let’s you start streaming after opening the software.
4. Under Streams, click Add to add a new streaming server.
Now follow the specific instructions for your streaming server: IceCast or SHOUTcast.
IceCast
1. Using the connection details, available in your AzuraCast instance, under the Streamers/DJ Accounts page,
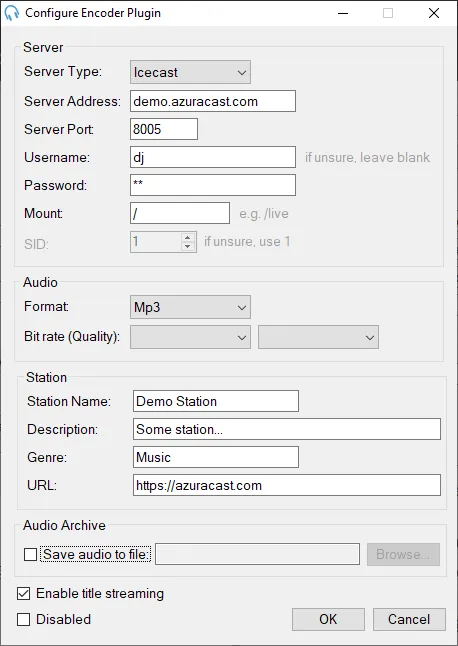
Connection Information for IceCast
… fill this form in the PlayIt Live software.
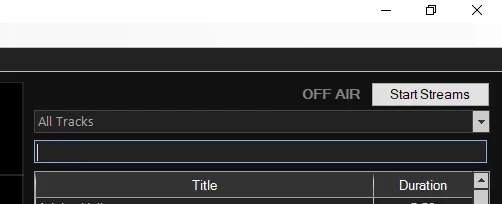
Using the details above to fill the form
Don’t forget to change these details with yours, this is just an example!
Notes:
-
The Save audio to file field can be left unchecked. Check it if you want to record the stream into a MP3 file.
-
Under Audio, select the audio bitrate and the format (stereo or mono) that matches your station.
2. After filling the form fields, click OK to save the server details.
3. To start broadcasting, click on Start Streams here on in the main interface of the software.
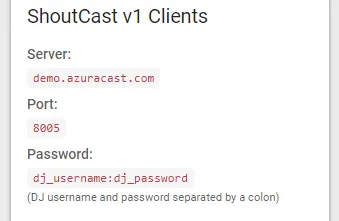
If the server is configured correctly, the OFF AIR text will change to ON AIR. If not, re-check your configuration.
SHOUTcast
1. Using the connection details, available in your AzuraCast instance, under the Streamers/DJ Accounts page, …

… fill this form in the PlayIt Live software.
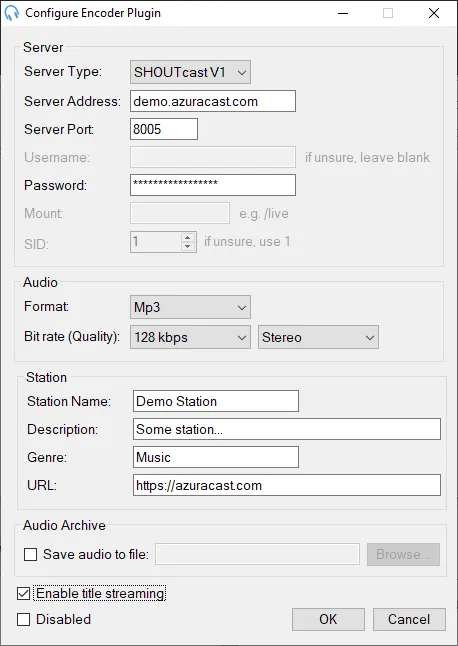 Using the details above to fill the form
Don’t forget to change these details with yours, this is just an example!
Notes:
-
In Server Type, select SHOUTcast v1.
-
The Password field must be in this format:
dj_username:dj_password -
The Save audio to file field can be left unchecked. Check it if you want to record the stream into a MP3 file.
-
Under Audio, select the audio bitrate and the format (stereo or mono) that matches your station.
2. After filling the form fields, click OK to save the server details.
3. To start broadcasting, click on Start Streams here on in the main interface of the software.

If the server is configured correctly, the OFF AIR text will change to ON AIR. If not, re-check your configuration.